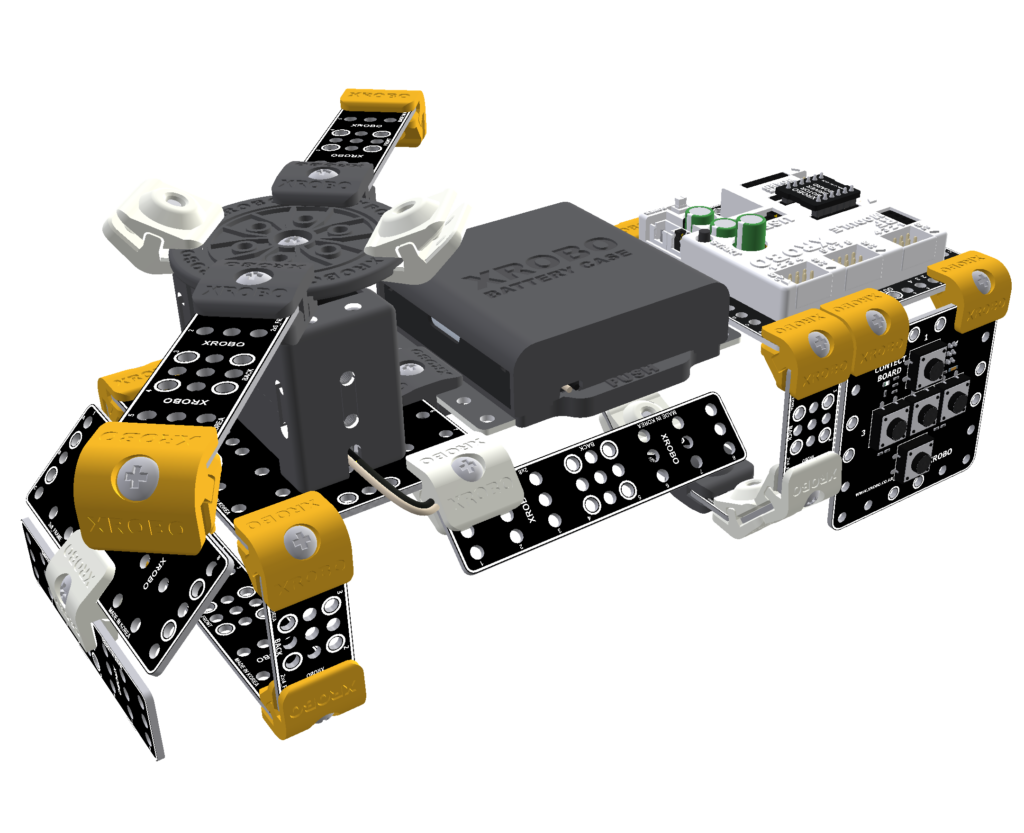
1. Robot Assembly
1) Assembling the Robot
- Please refer to the manual for assembling the robot.
- Ensure all components are properly connected.
2) Verifying Cable Connections
-
Left DC Motor with the left wheel
→ Connect to the M1 port on the CPU board. -
Right DC Motor with the right wheel
→ Connect to the M2 port on the CPU board. -
X-Keypad used for controlling the robot
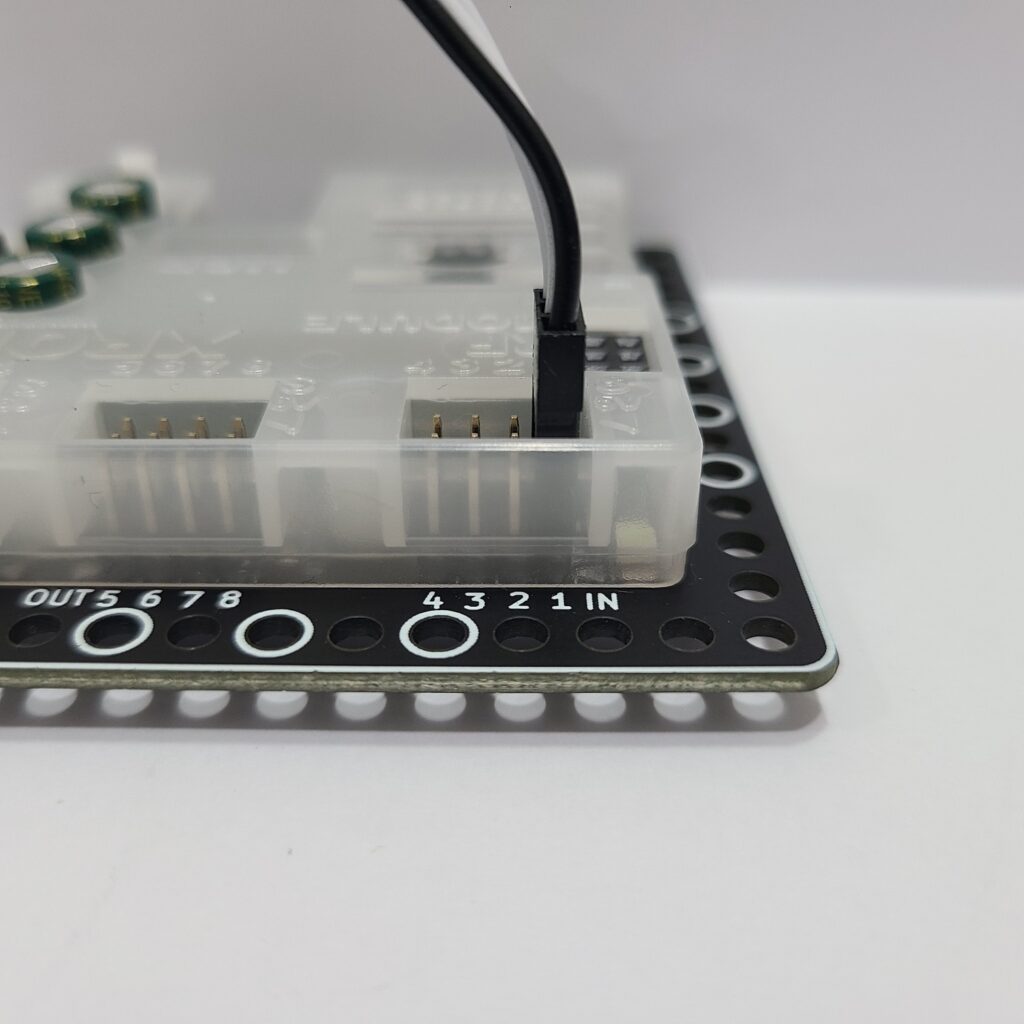
→ Connect to the IN1 port on the CPU board.
2. Code Upload & Robot Operation
1) If You Are Not Coding
- ① Turn on the power to the CPU board.
- ② Press and hold the START button for more than 2 seconds. Release it when you hear the "Do Re Mi Fa Sol La Ti Do" melody.
- ③ Press the START button 4 times to select the "Fa" tone.
2) If You Are Coding the Program Yourself
① Preparing for Upload
- Ensure mBlock is installed on your computer. If not, please install mBlock.
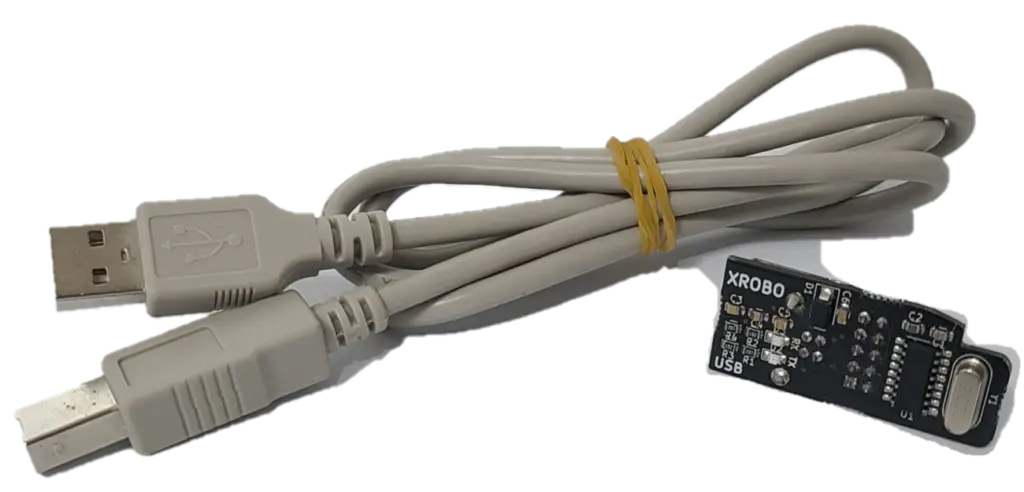
- To operate the robot, you will need a download board and a download cable. If you do not have these components, please purchase them.
② Coding the Program
- Launch mBlock and freely code your program by referring to the coding examples or the manual.
③ Uploading the Code
- Upload the code to the robot by following the instructions on the upload method page or video (starting at 34 seconds).
④ Operating the Robot
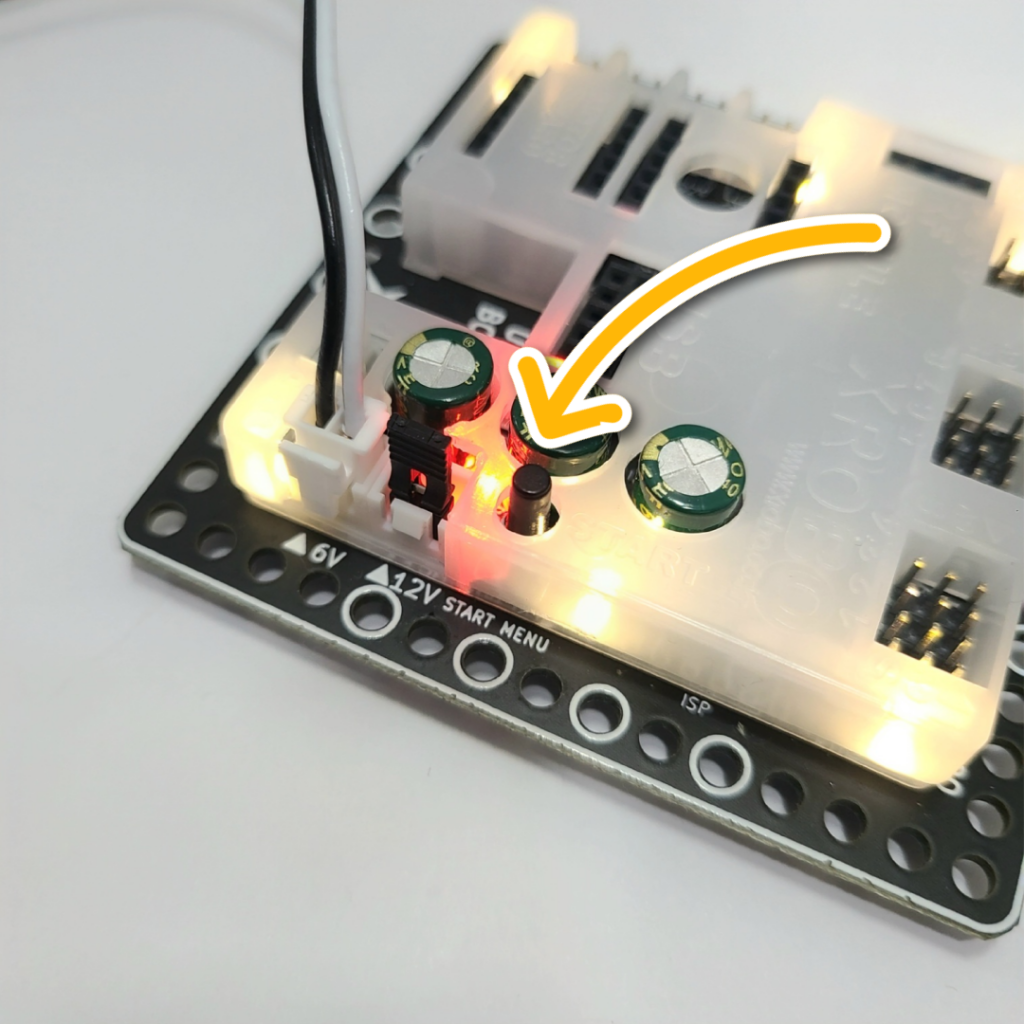
- ① Turn on the power to the CPU board.
- ② Briefly press the START button on the CPU board and then release it.
- ③ Turn on the power to the remote control and have fun controlling the robot.
3. Coding Examples
1) Playing a Melody
Play ‘La’
Let’s play the note ‘La’ with a sound duration of 200 and a wait time of 250.

The note is played for the duration specified by the ‘sound duration’, where a time of 200 is equivalent to 0.2 seconds.
Play ‘Do-Mi-Sol-‘
Let’s play the melody ‘Do-Mi-Sol-‘ with a sound duration of 200 and a wait time of 250. Notes with a ‘-‘ symbol at the end are played twice as long as the others.
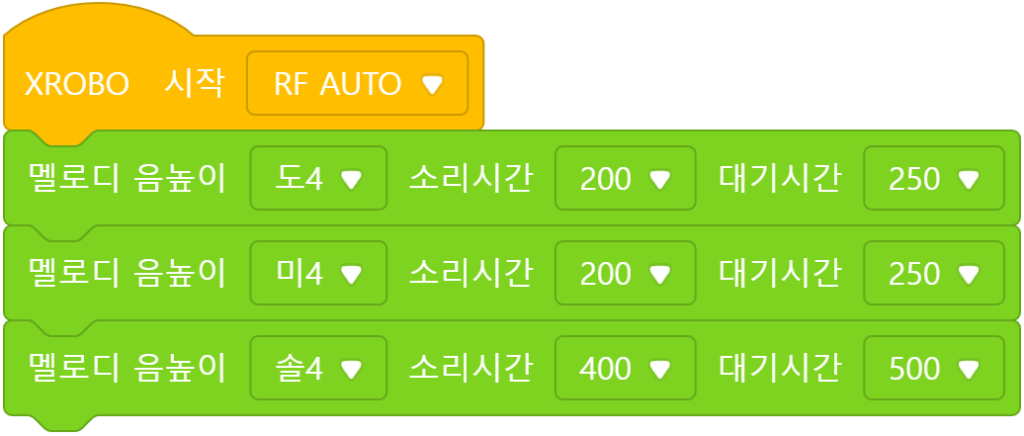
When playing notes with a ‘-‘, double the sound duration and wait time to 400 and 500, respectively.
2) Rotating the Gauntlet Propeller
Counterclockwise Rotation
Let’s spin the propeller at a speed of 10 for 1 second.

Since the rotating DC motor with the propeller is connected to the M1 port, set the speed of ‘M1′ to ’10’.
Clockwise Rotation
Let’s spin the propeller at a speed of -10 for 1 second.

If the speed value is prefixed with a ‘-‘, the DC motor will rotate in the opposite direction.
3) Controlling the Gauntlet with the X-Keypad
Press a button on X-Keypad
Let’s program the robot to perform specific actions when a button is pressed on the X-keypad:
- Button 3: Rotate the propeller counterclockwise
- Button 4: Rotate the propeller clockwise
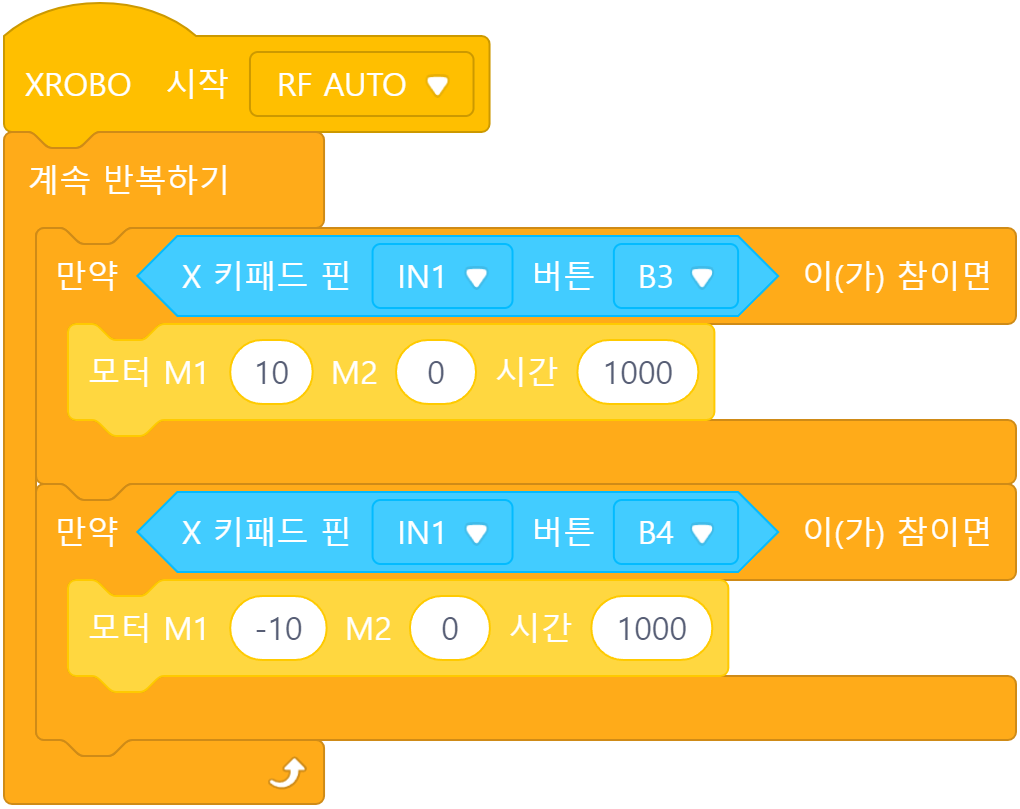
X-키패드가 IN1 포트에 연결되어 있으므로 ‘IN1’을 선택합니다.
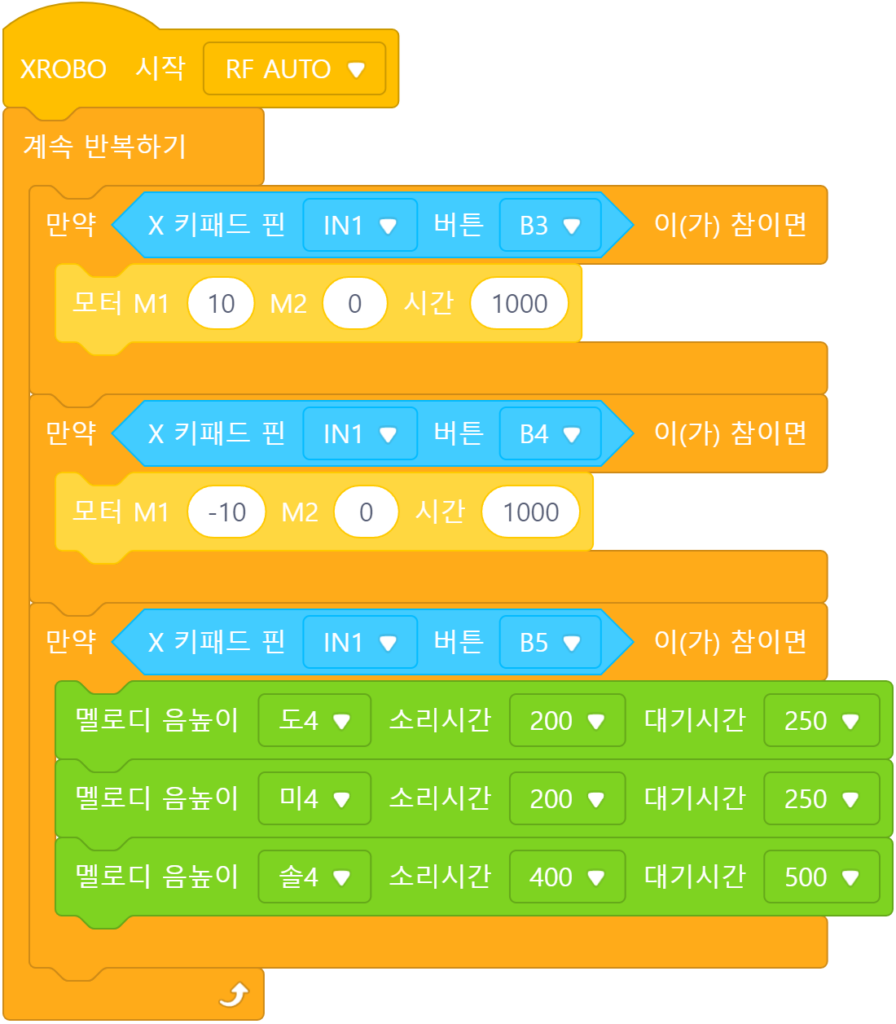
Press a button on X-Keypad
Let’s program the robot to perform specific actions when a button is pressed on the X-keypad:
- Button 3: Rotate the propeller counterclockwise
- Button 4: Rotate the propeller clockwise
- Button 5: Play 'Do-Mi-Sol'
4. Troubleshooting Robot Issues
1) When the Power Does Not Turn On
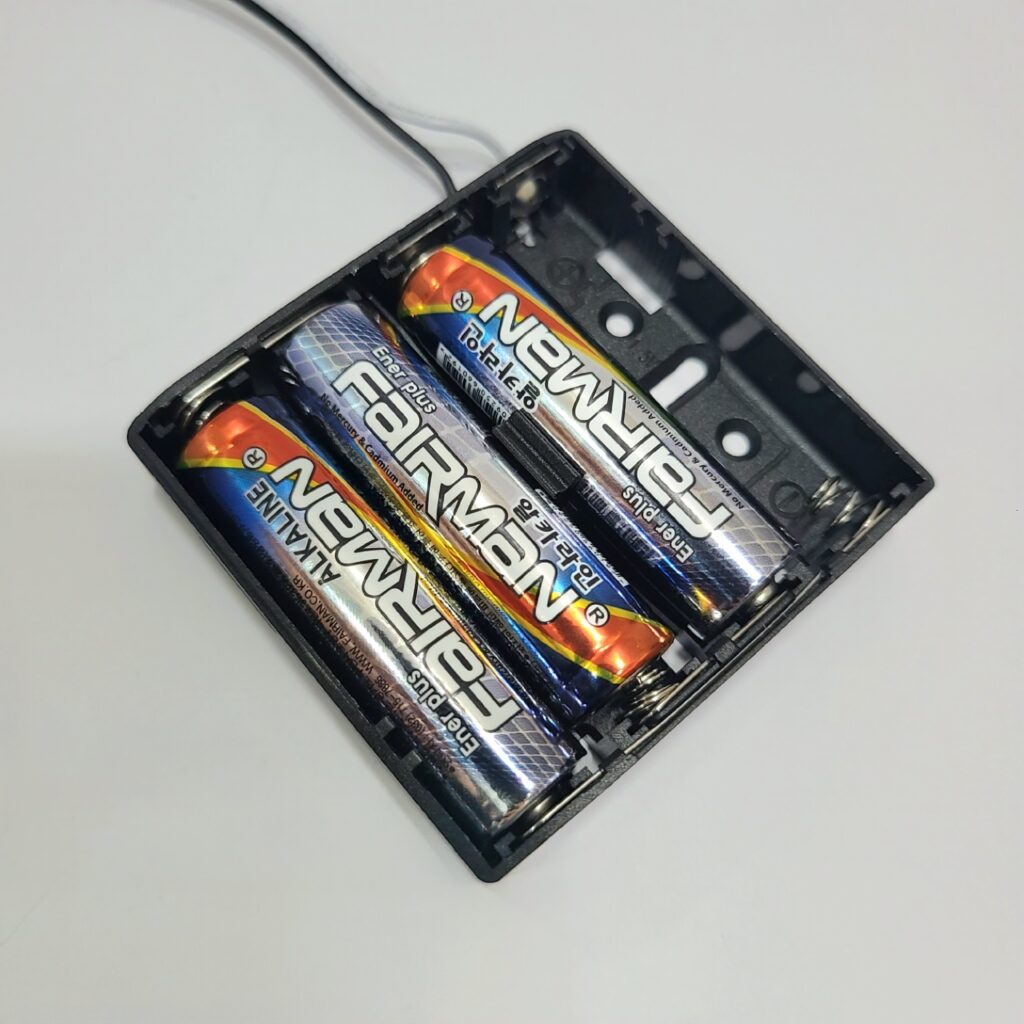
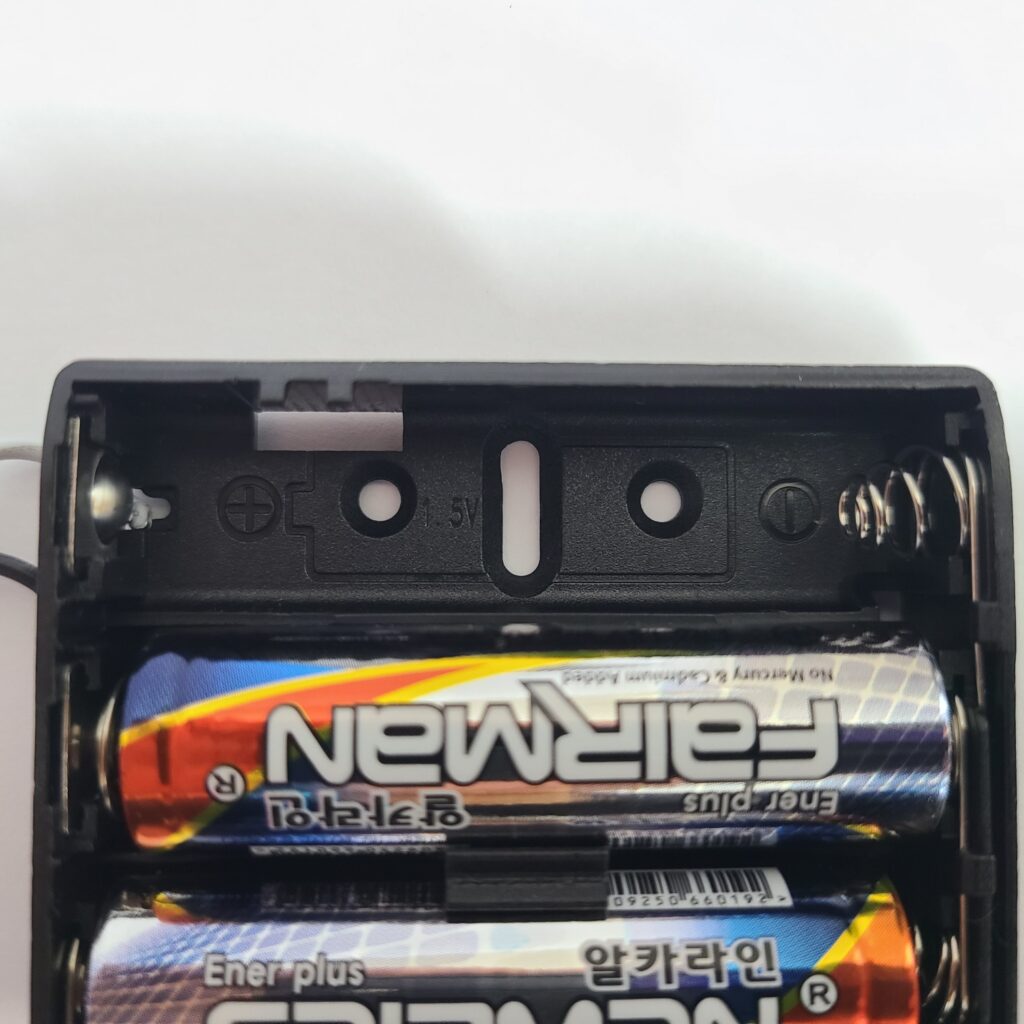
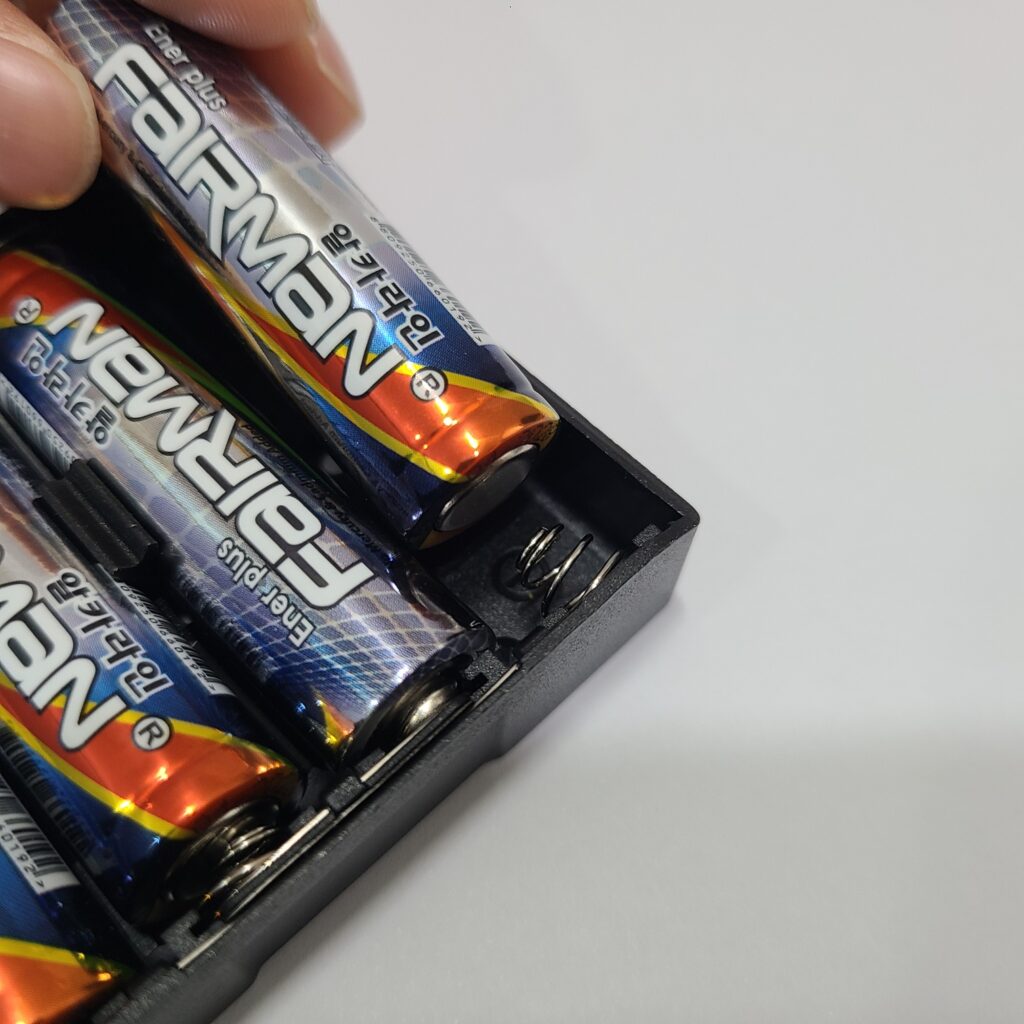
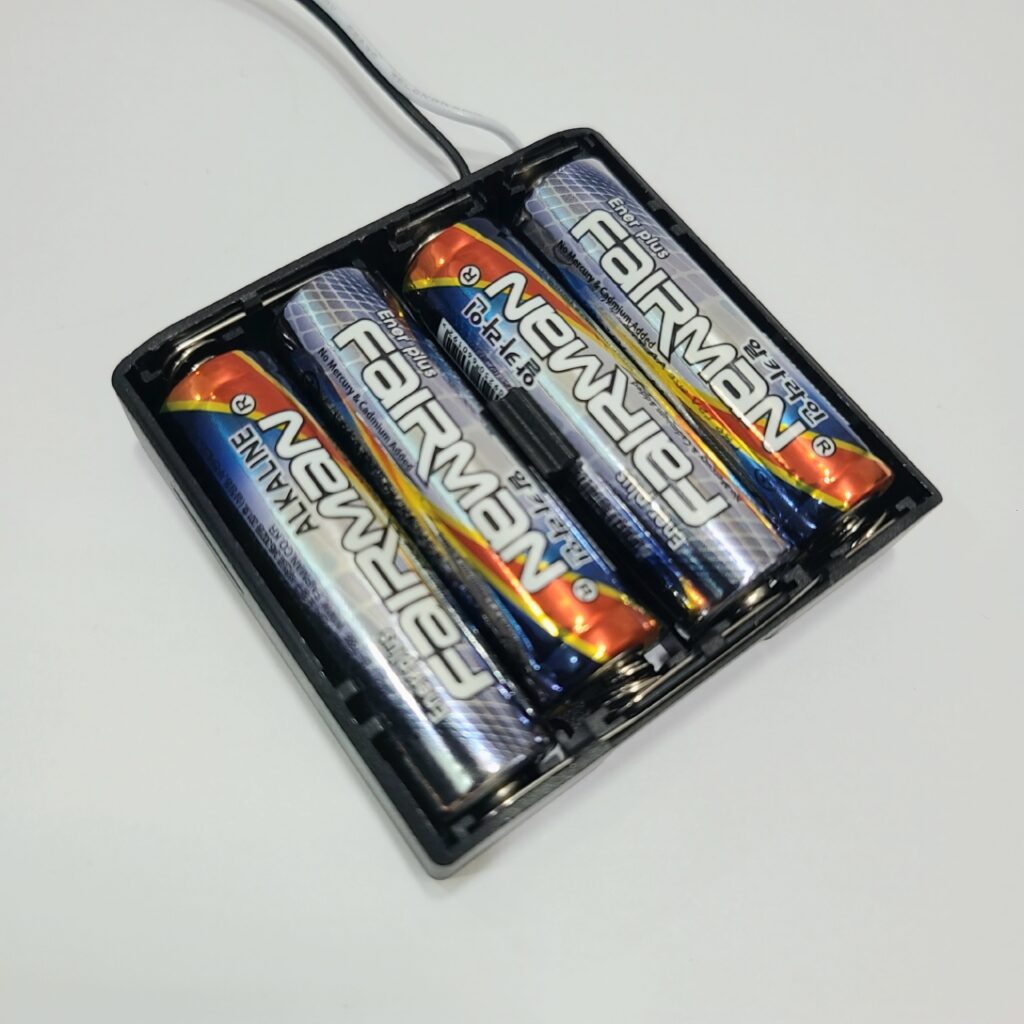
- Ensure the batteries are inserted with the correct polarity, matching the ‘+’ and ‘-‘ signs.
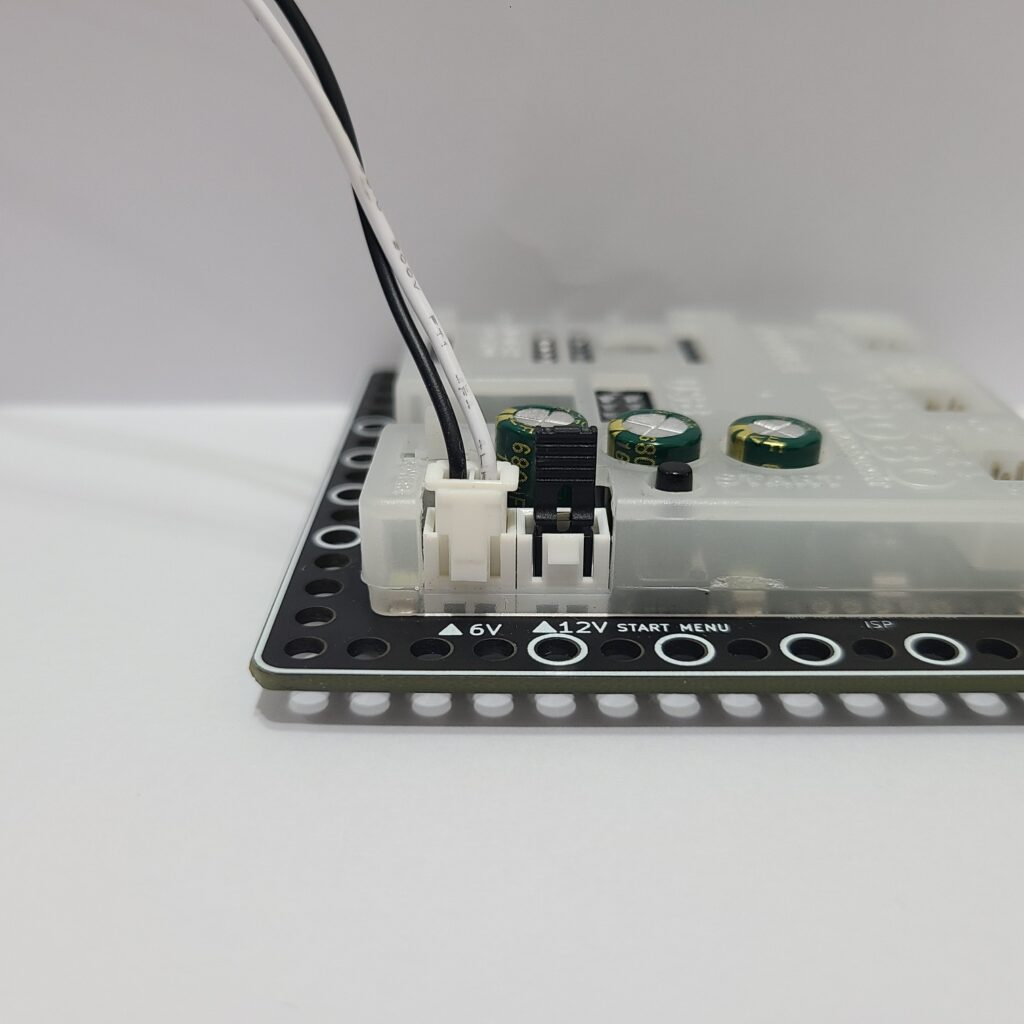
- Verify that the jumper cap is properly inserted into the 12V power connector on the CPU board.
- If there is no jumper cap available, use a 3×8 bolt to connect to the 12V power connector as an alternative.
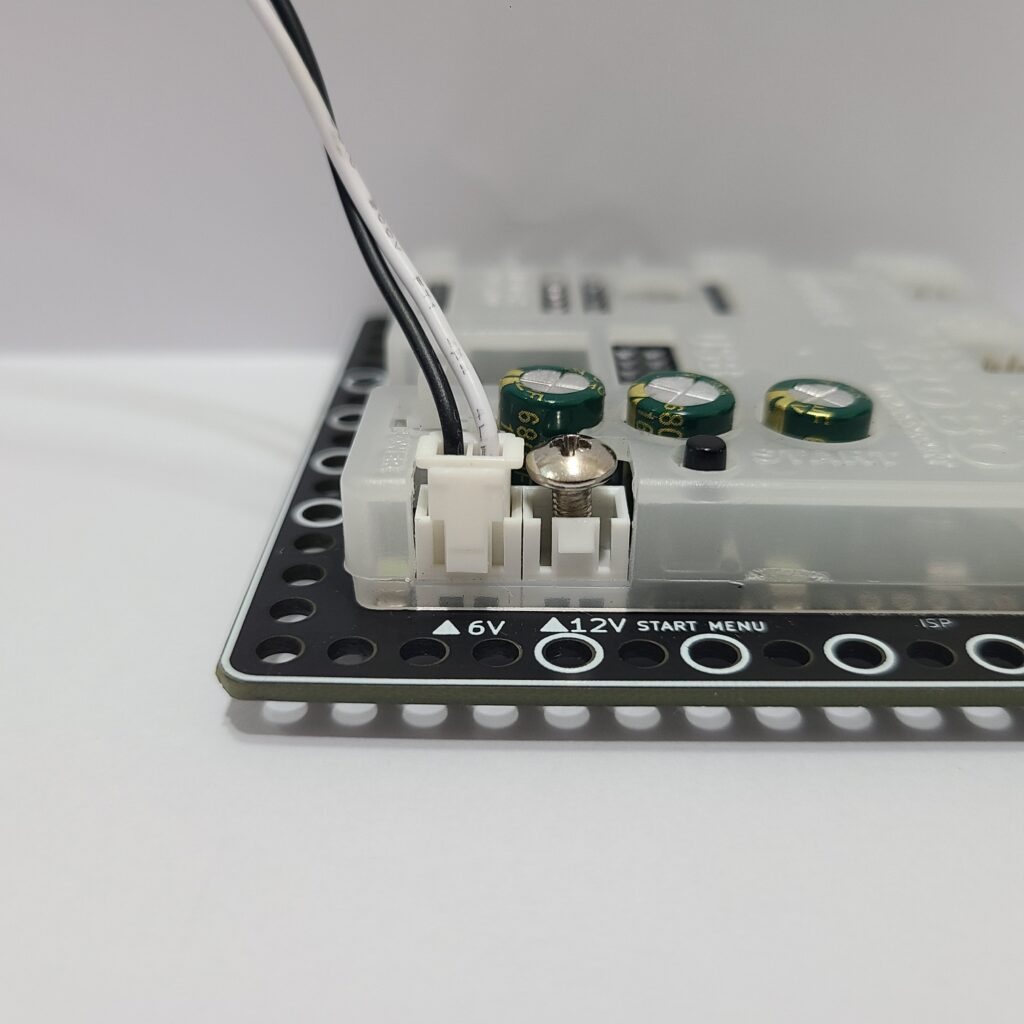
- Inspect the battery pack cable for any breaks or disconnections.
- Ensure that the battery pack cable is securely connected to the 6V power connector on the CPU board.
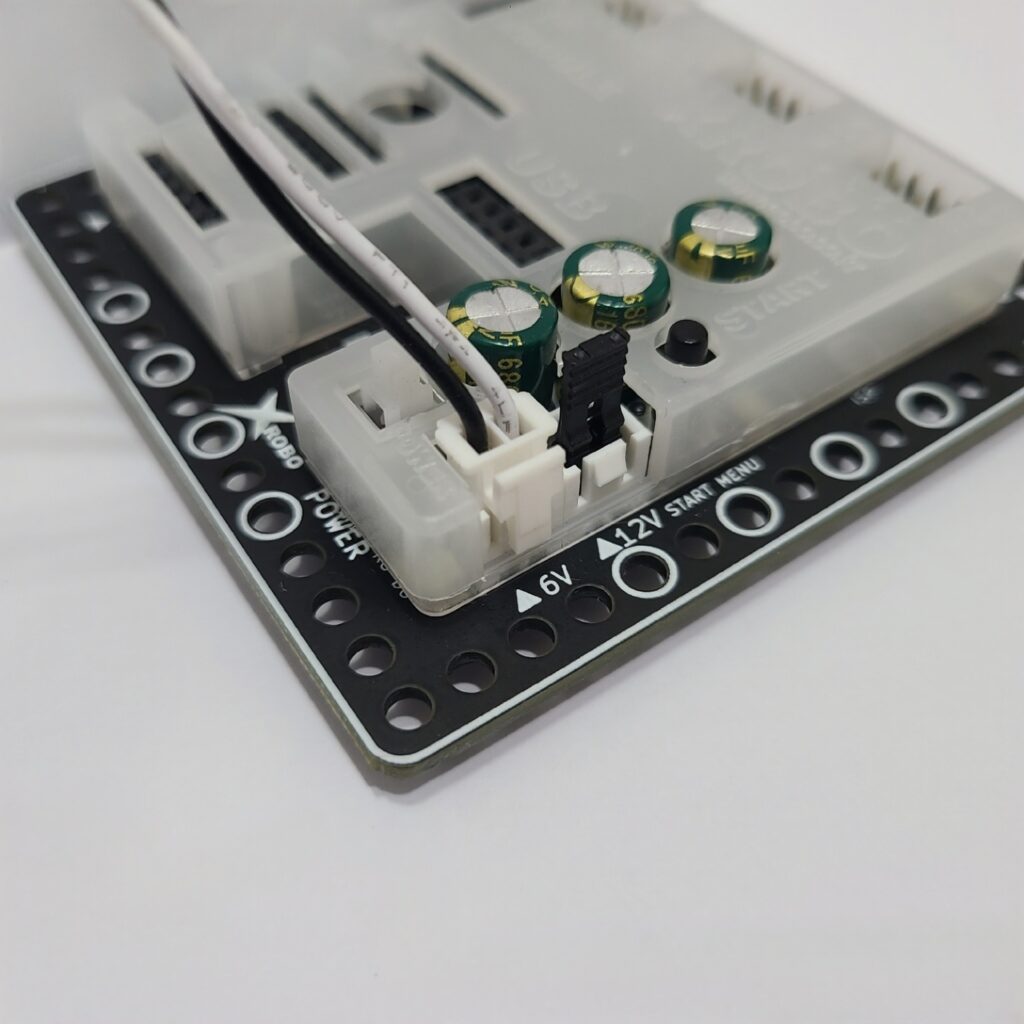
2) When the DC Motor Does Not Rotate / Rotates in the Wrong Direction
- Ensure that the motor cables are correctly connected to the motor port.
- Check the motor cables for any signs of disconnection or damage.
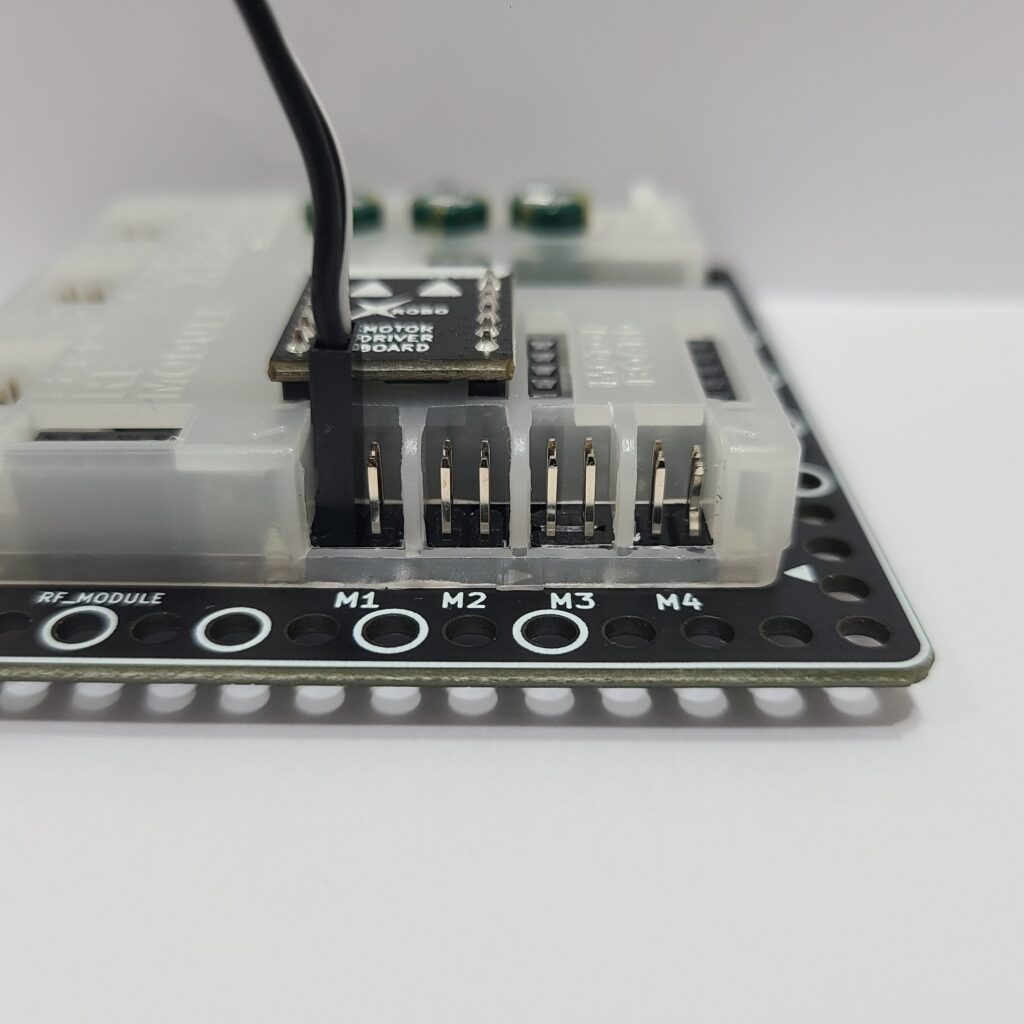
- Confirm that the motor cables are inserted vertically into the motor ports on the CPU board. If connected horizontally, the motor may not rotate.
- Ensure the black wire of the motor cable is aligned with the arrow on the CPU board case. If connected in reverse, the DC motor will rotate in the opposite direction.
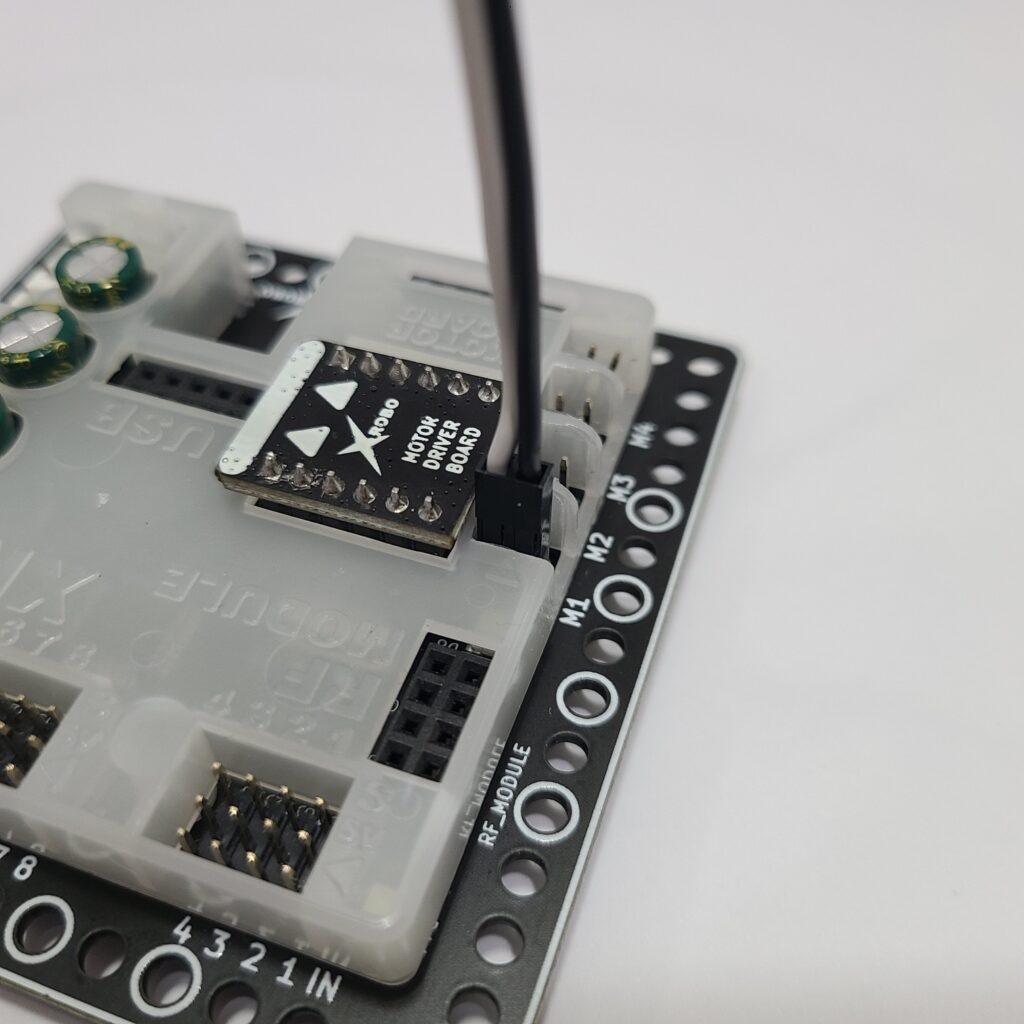
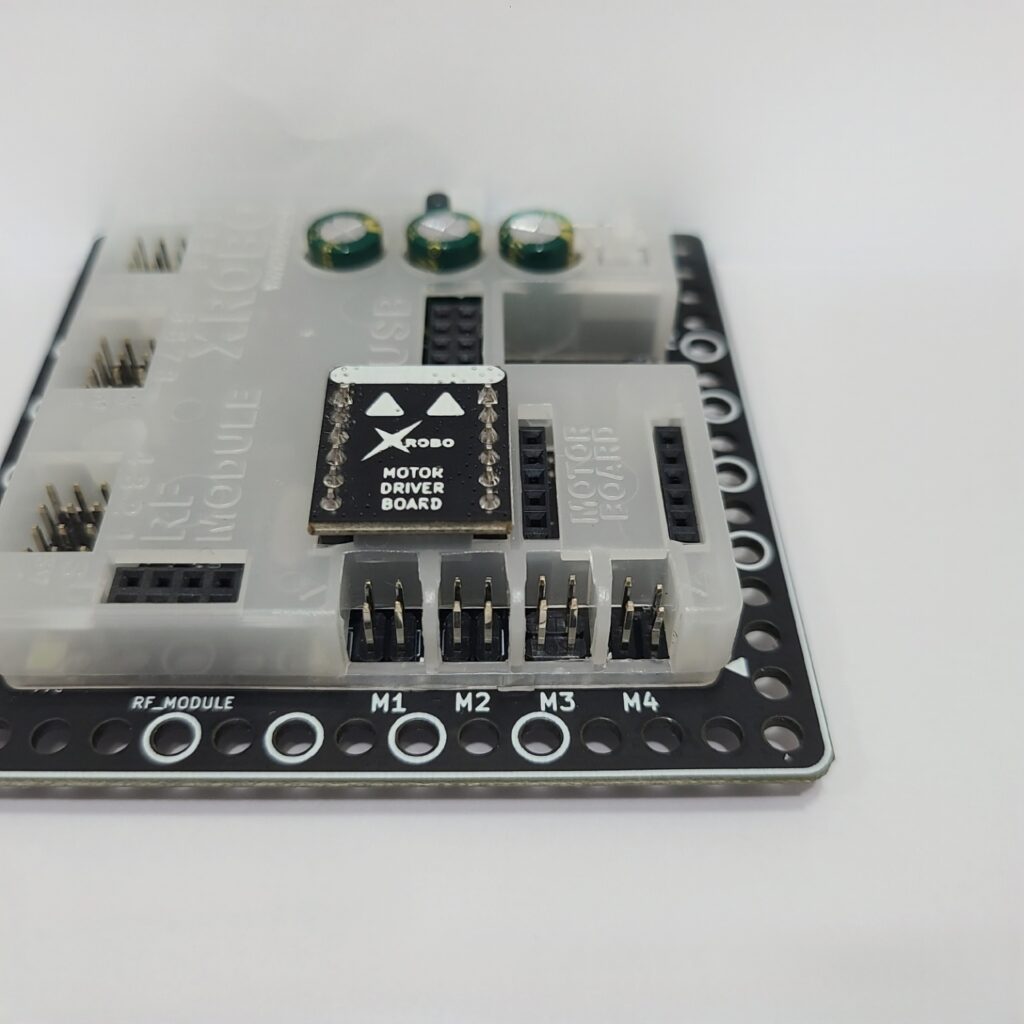
- If the DC motor driver board is not inserted according to the assembly diagram, do not turn on the power. Insert it correctly as per the assembly diagram to avoid overheating risks during operation.
- If the DC motor driver board is not inserted, place it properly and then turn on the power to check the operation.
3) When the Robot Operates Abnormally
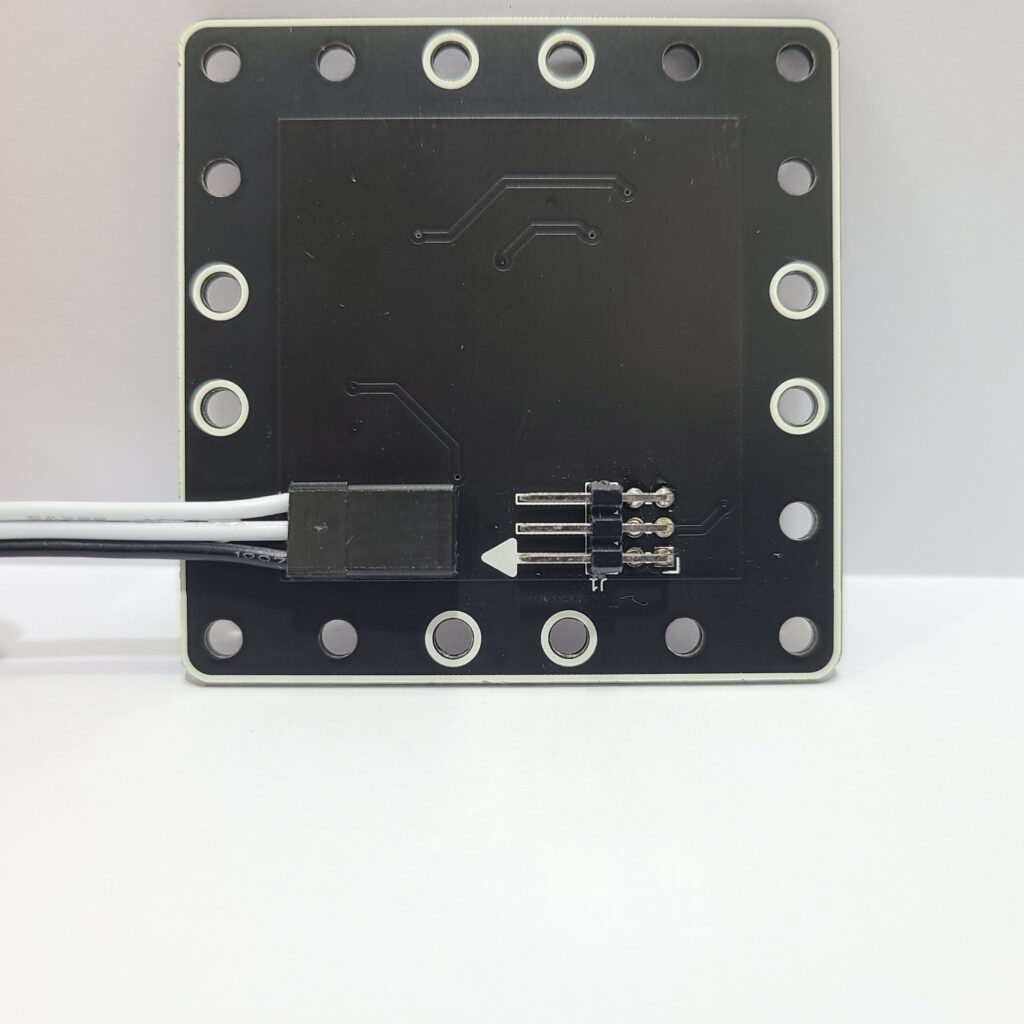
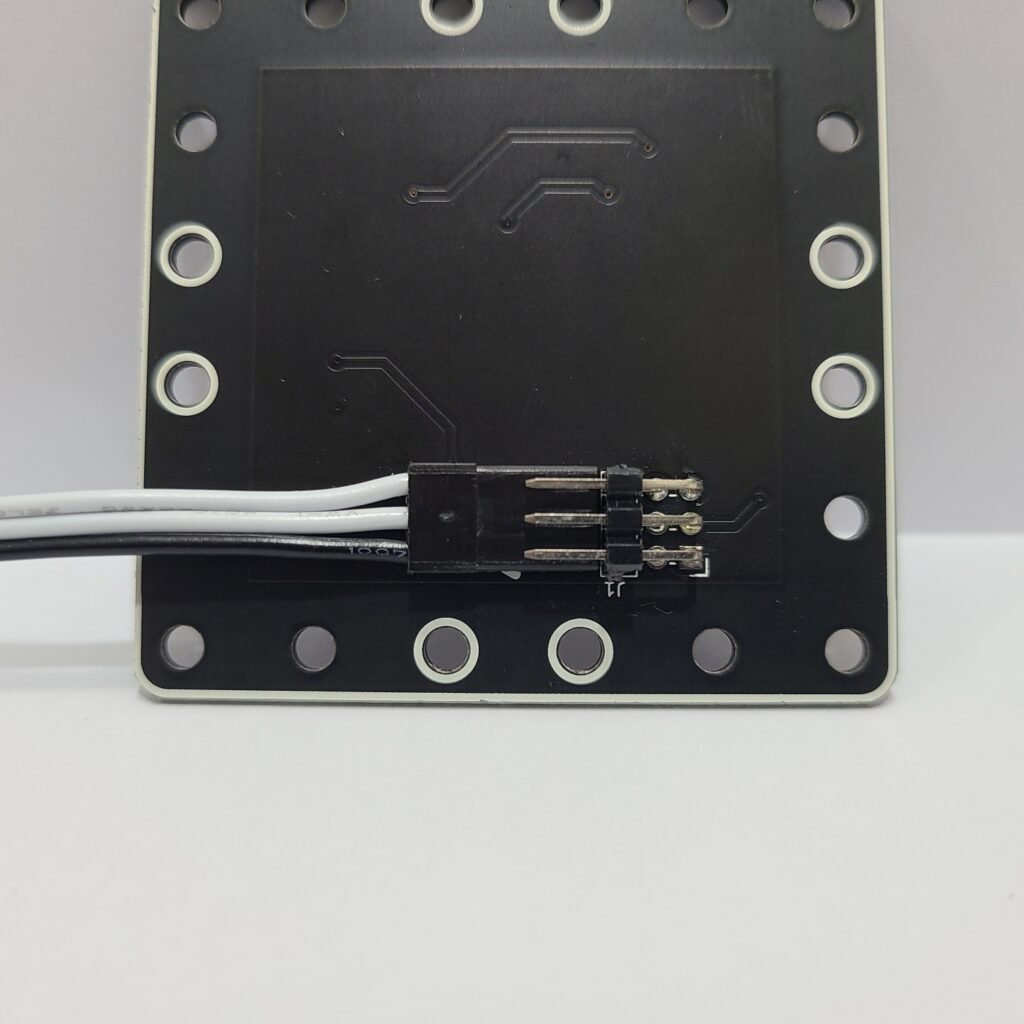
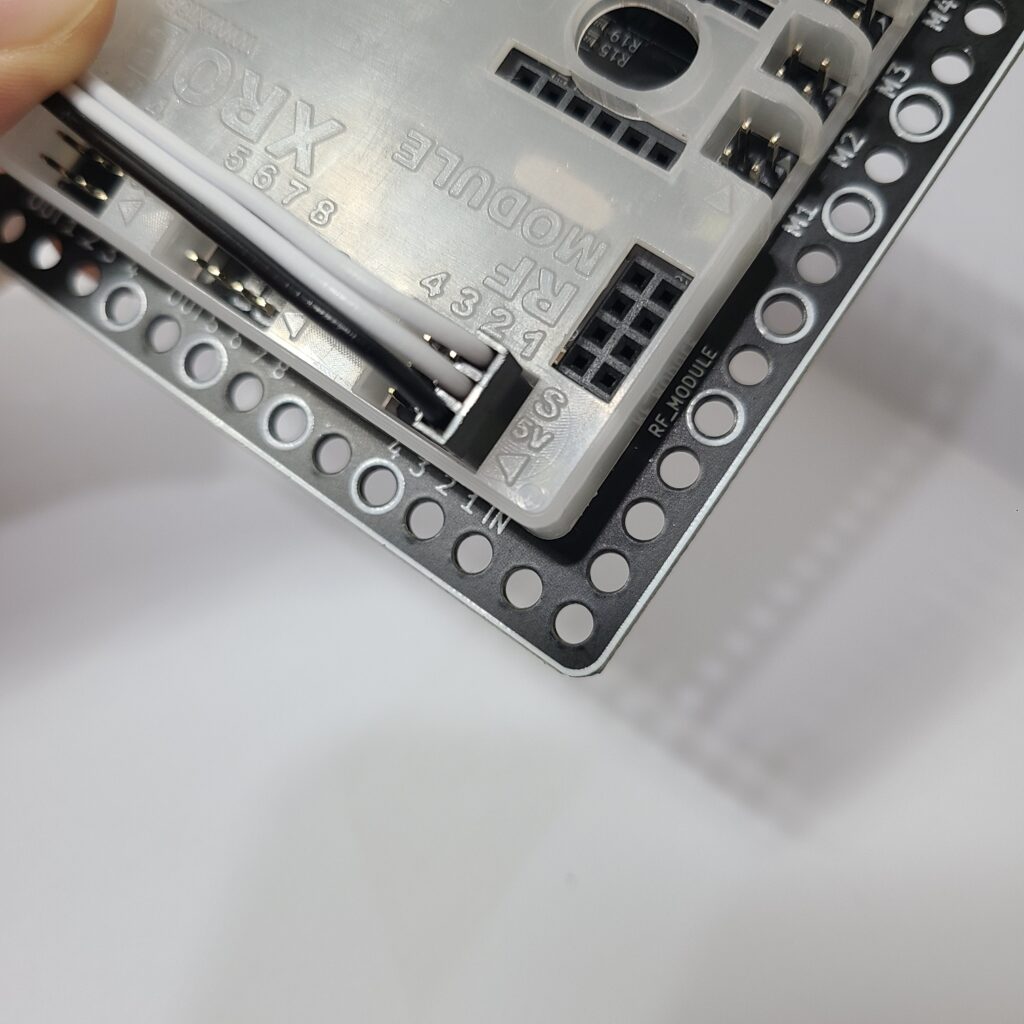
- Verify that the black wire of the 3-PIN cable is connected to the side with the white line on the X-keypad pin. (Inserting the 3-PIN cable in reverse can cause a short circuit, resetting the CPU board.)
- Ensure that the black wire of the 3-PIN cable is aligned with the arrow on the CPU board case. (Reversing the 3-PIN cable can cause a short circuit, resetting the CPU board.)
- Check that the cables are not caught in the drivetrain. If the cables are entangled with the drivetrain, the robot may not function properly.
