- When the Robot Does Not Move at All When Pressing the Remote Control Button
- When the Robot Behaves Erratically When Pressing the Remote Control Button:
STEP BY STEP
1. Check Hardware
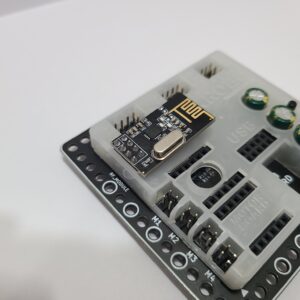
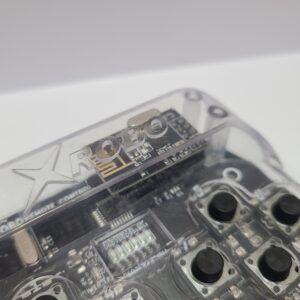
- If the RF module is not inserted into the CPU board RF module port, the robot will not move when pressing the remote control button.
- If the RF module is not inserted into the remote control transmitter RF module port, the robot will not move when pressing the remote control button.
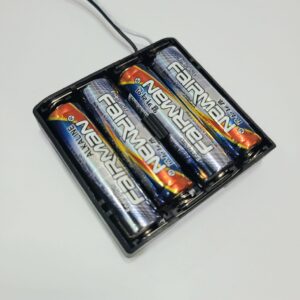
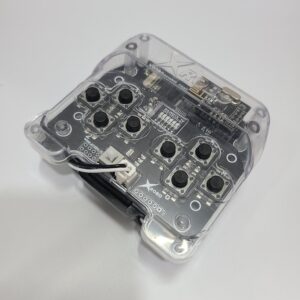
- The battery polarity may be incorrectly connected in the remote control battery pack. In this case, the robot will not operate when pressing the remote control button. Please check the battery polarity.
- The battery pack cable may be disconnected from the power connector. In this case, the robot will not operate when pressing the remote control button. Please ensure the battery pack cable is connected to the remote control power connector.
- The battery pack cable of the remote control may be damaged. In this case, the robot will not operate when pressing the remote control button. Please check if the cable is undamaged.

- The battery polarity may be incorrectly connected in the remote control battery pack. In this case, the robot will not operate when pressing the remote control button. Please check the battery polarity.
If you need further assistance or have any additional questions,
2. Check Code
1) If You Have Uploaded an
Operation Program

- If an operation program from a different stage is uploaded, the robot may behave erratically. Please ensure that the uploaded operation program matches the stage of the robot you are using .
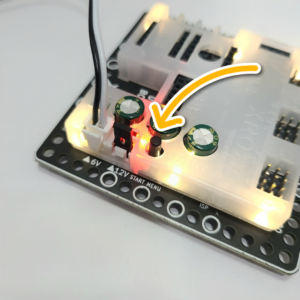
- If the robot is selected incorrectly, it may behave erratically. Please press the START button the correct number of times to select the robot properly.
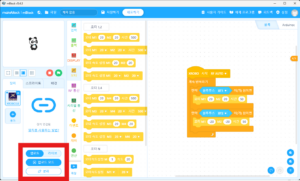
- If the code is not uploaded correctly, the robot may not function or may behave erratically. Please upload the action program again.
If you need further assistance or have any additional questions,
2) If You Have
Coded Manually
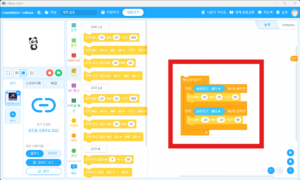
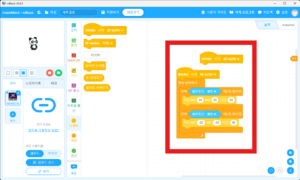
- If there is no START block in your code or if there are multiple START blocks on the screen, the robot will not function. Please ensure there is exactly one START block in your code.
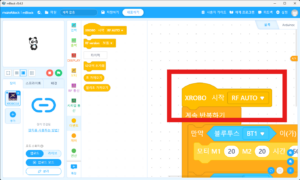
- If the START block is set to a mode other than ‘RF AUTO’, the robot may not function or may behave erratically. Please set the START block mode to ‘RF AUTO’.
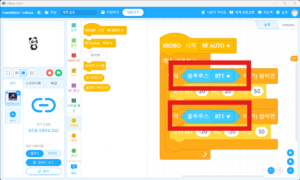
- If the Bluetooth block is not used or is used incorrectly in your code, it may not execute properly. Please ensure that the Bluetooth block is used correctly.

- If the code is not uploaded correctly, the robot may not function or may behave erratically. Please upload the action program again.
If you need further assistance or have any additional questions,
3. Pair
What is Pairing?
- Pairing refers to the process of linking a remote control to the CPU board you want to use.
- Once paired, the CPU board and the remote control share an ID and will only receive signals from each other if they have the same ID.
- The ID is indicated by which of the six LEDs on the remote control is lit.
1) Pairing with Manual ID
- Important: Pair Only One Device at a Time
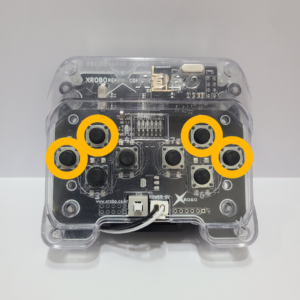
- Simultaneously press and hold the ③, ①, ⑤, and ⑧ buttons on the remote control.
- Release the buttons as soon as the remote control LED starts blinking.
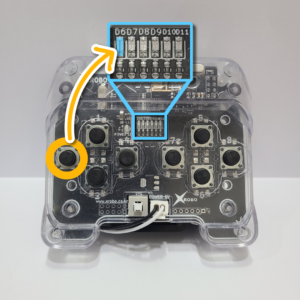
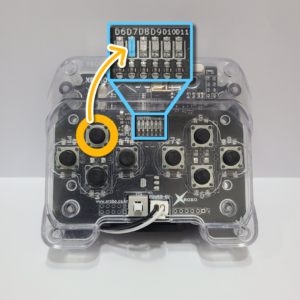
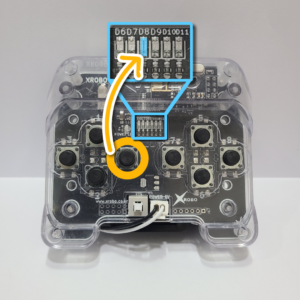
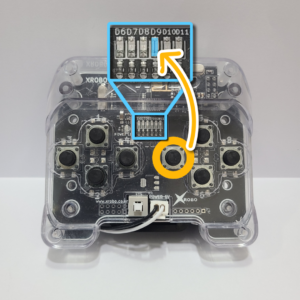
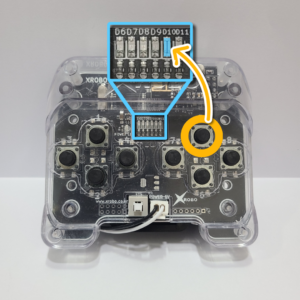
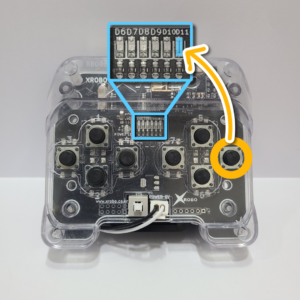
- Test each button: ③, ①, ④, ⑦, ⑤, and ⑧ to toggle the remote control LED on and off.
- 1st LED – Button ③
- 2nd LED – Button ①
- 3rd LED – Button ④
- 4th LED – Button ⑦
- 5th LED – Button ⑤
- 6th LED – Button ⑧
- Ensure that at least one LED is always on. When playing with friends, make sure that the lit LEDs on each remote control are different.
- When playing with friends, make sure that the lit LEDs on each remote control are different.
- Multiple Remotes for One Robot: Pair one remote control with the robot. Then, set the LEDs on the other remotes to match the paired remote control’s LED pattern.
- One Remote for Multiple Robots (XW stage): When pairing the remote control with each robot, keep the LEDs consistent across all pairings.

- Hold the START button on the CPU board until the CPU board LED starts blinking, then release the button immediately.
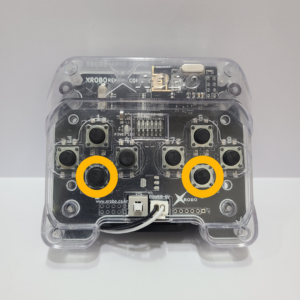
- When you hear a "ding-dong" sound from the CPU board, quickly press and release the ② and ⑥ buttons on the remote control simultaneously.
If you need further assistance or have any additional questions,
2) Pairing with Random ID
- Important: Pair Only One Device at a Time

- Simultaneously press and hold the ③, ①, ⑤, and ⑧ buttons on the remote control.
- Release the buttons as soon as the remote control LED starts blinking.


- Press each of the remote control buttons ①, ③, ④, ⑥, ⑦, and ⑧ to turn on all six LEDs.
- 1st LED – Button ③
- 2nd LED – Button ①
- 3rd LED – Button ④
- 4th LED – Button ⑦
- 5th LED – Button ⑤
- 6th LED – Button ⑧

- Hold the START button on the CPU board until the CPU board LED starts blinking, then release the button immediately.

- When you hear a "ding-dong" sound from the CPU board, quickly press and release the ② and ⑥ buttons on the remote control simultaneously.
If you need further assistance or have any additional questions,
